Google’s nexus Android smartphones along with tablets are highly sophisticated devices. As you read the following article, you are going to transfer your priceless and coveted photos from Laptop to Nexus 4, Nexus 7 along with Nexus 10 with great ease and comfort.
There are various ways for you to transfer photos from laptop to a Nexus device. Cloud storage apps in the form of Sugarsyns, Dropbox etc give the reason for you to transfer them via-Bluetooth, but it does not stand out to be a fast way.
Following are the couple of guides which will assist you towards transferring photos to a Nexus device. One of the guides relate with that of Apple Mac while the other one is dedicated for running Windows.
Transfer photos from laptop to Nexus 7, Nexus 4 and Nexus 10 from Mac
1. Step One
The first step entails you to visit www.android.com/filetransfer. Thereby, you are required to download the Android File Transfer software in order to install it.
2. Step Two
With the help of a supplied cable, plug your Nexus device.
3. Step Three
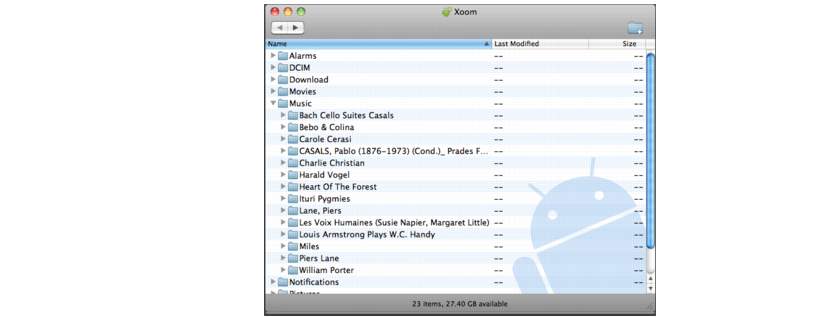
Thereby, just by double click on Android File Transfer software; you are going to launch it. After all, you just need to browse files and folders on your Mac in order to transfer photos to your Nexus device.
Transfer photos from laptop to Nexus 7, Nexus 4 and Nexus 10 from Windows
1. Step One
In the beginning, it is imperative for you to plug your Smartphone or tablet into laptop or PC in order to transfer the files. It can be done with the assistance of a cable which is supplied with your device in the form of a microUSB cable.
2. Step Two
You are going to get a popup menu of options, the moment you have plugged in your device. Thereby, you will find your Nexus device to be connected which will read like “connected as media device”. This is the position where you are able to choose various ways of transferring content in the form of photos to Nexus.
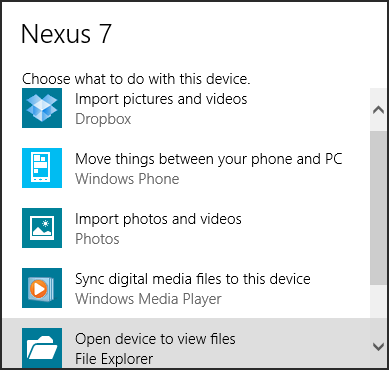
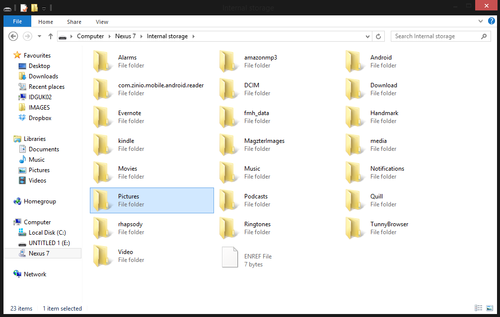
It is important to note down the fact that if you know the location of your files on your machine, resort to the option of “Open device to view files”. Here, Nexus Smartphone or tablet works at par with any USB memory stick or an external hard drive.
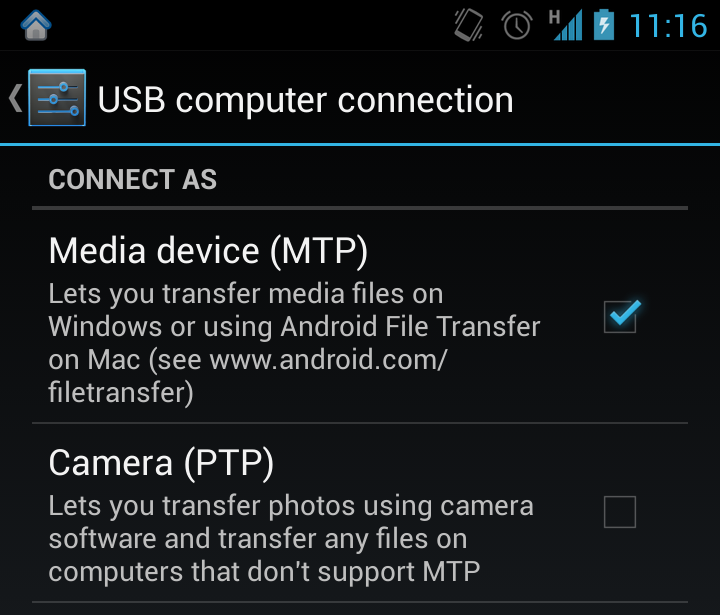
It is to be recommended that in the event where your Nexus does not show in a proper way, then you have to go to settings and select “Connect as media device”. Here, by going to drop down notification menu, you will be able to access it with great ease and comfort.
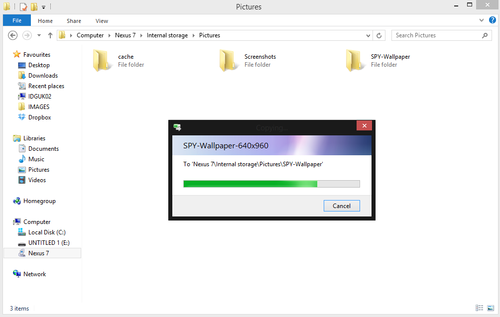
3. Step Three
Finally, you will be dragging and dropping the photos which you are looking forward to transfer from your machine to your Nexus Smartphone or tablet. While you are in the process of doing the same, you are going to place them in a photos folder which is labeled as “Pictures”.
Finally, you are able to transfer the photos in the easiest possible way like never before. Great isn’t it?
Speak Your Mind