If you own a lot of files and want to share them with your friends and family or for your job purpose then you don’t have to upload them to any file sharing site. Most file sharing site offer free upload but the file size that you can upload is limited so often you are required to pay for a subscription.
Moreover the people who are downloading they can download for free but this will provide them a limited bandwidth and file download takes a long time unless they pay for a premium subscription and get unlimited bandwidth for download.
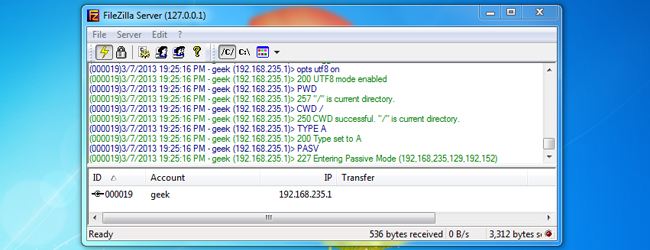
So we have prepared a guide for you using a free software called FileZilla that will allow you to use your windows PC as an FTP repository allowing other users to access your directory over the internet and download the files from your PC directly.
How To Use FileZilla To Create An FTP Server
- Download Filezilla and install it using the default settings. This will allow filezilla to launch whenever you boot up windows.
- After installation a window will pop up asking you for password to connect to server so just click ok.
- After the FTP server interface has finished loading you need to assign a directory that will act as FTP repository. If you don’t have the directory created then minimize filezilla and create the directory. For the purpose of this guide we will use the folder C:UsersPindigitDesktopFTP
- On the server interface click on Edit at top and click on users. The windows that comes up on left side click on shared folders.
- In this click on add below the users. Enter the username for the computer that will be accessing your directory.
- After you are done entering the name click on ok and then you have to assign user permissions to the repository.
- By default the user will be able to read and access the sub directories in the repository. To give further access such as copying files to the repository check the box beneath file and directories.
- After you have set up the various permissions click ok.
- Apart from assigning users with a password you can further set up strong security measures to prevent unauthorized access to your repository. Go to edit > settings > general settings and look under port. The default will be 21 so change it to a random 5 digit number
- If you want to limit the range of IP’s connecting to your machine then click on edit > settings > IP filter.
- In the first box use * to block all IP from connecting to your machine. In the second box add the IP’s that you want to connect to your machine for example IP range from 10.1.1.120 and 192.168.1.0/24 will be able to connect to your server.
- In addition to this method there is an autoban feature in Filezilla which makes sure to lock out users for a short period of time who tried to log in unsuccessfully after 3 or 5 attempts.
- If you are using a firewall then you need to add an exception for your FTP server. So open your firewall and click on inbound rules and click on new rule and enter the port number that you have assigned to your FTP server.
- Now to allow other people to connect to your FTP server they have to map it on their computers. So right click on a blank area and click on add a network location.
- Add location wizard will start up and enter the IP address of your FTP server and click next twice.
- Enter the username and password and make sure to save it. So that next time you can access the FTP server as you are accessing your hard drive.
There you have an easy guide that will allow you to use FileZilla to host an FTP server on your windows machine thus making file sharing much easier.
Let us know if there any other way with which you can host an FTP server on your windows machine
Speak Your Mind